3D Color LoomMesh Editing & Full Spectrum Print Prep
Tutorials & Guides · 3dcolorloom.com
Turn a full-color 3D model into a multi-color print. 3D Color Loom cleans up the mesh, sizes it, and bakes the colors into filament layers your slicer understands. Everything runs in your browser — nothing is uploaded.
Import→Reduce→Edit→Size→Export→Slice
Guide 1
Quick start: your first full-color print
Beginner5 minutesNeeds: a full-color .glb / .obj / .3mf
Got a colored model from Meshy, Tripo, or a game file? Here's the shortest path from file to printer.
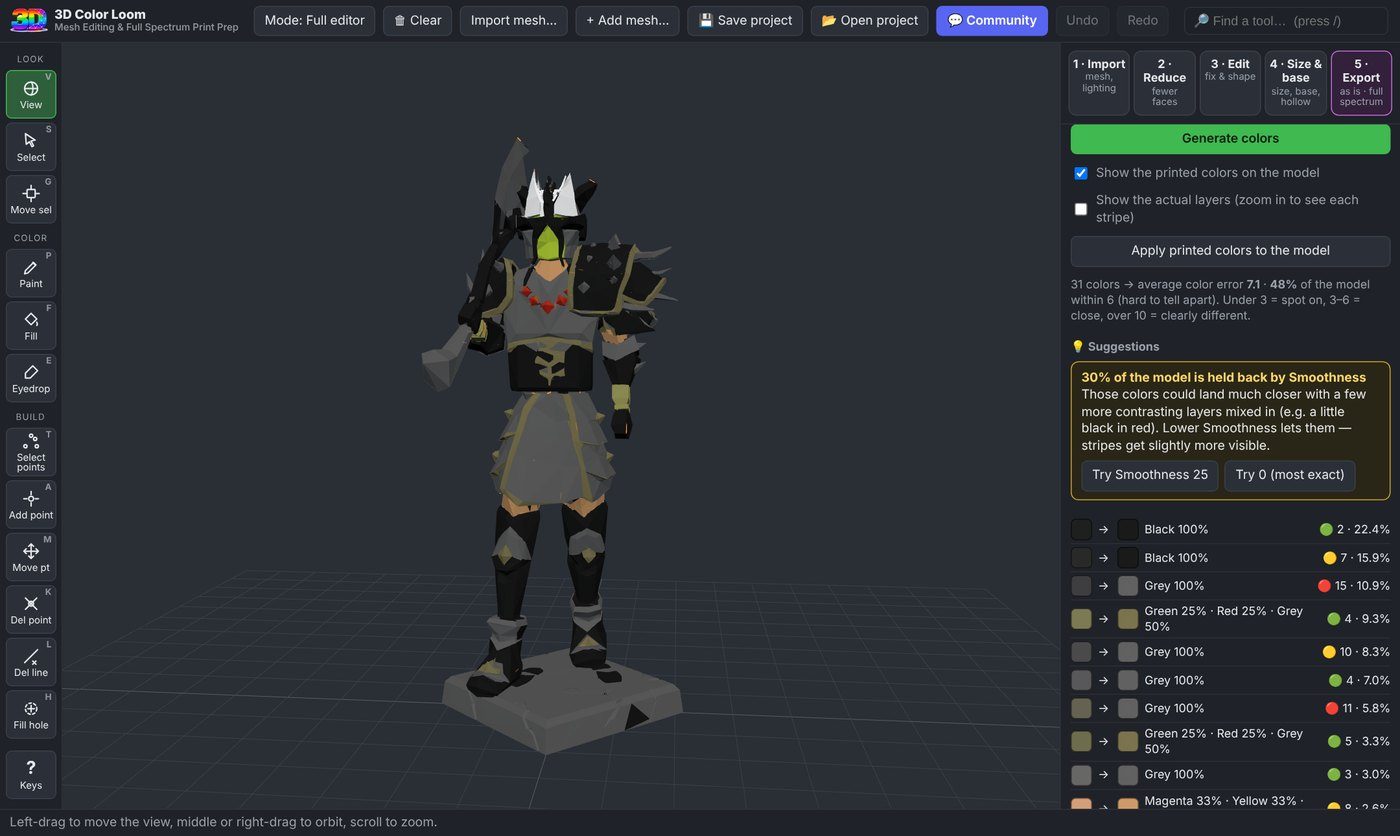
The finished result: your model with colors baked into filament layers, ready to export.
- Import. Drag your model onto the page, or click Import. Big AI models (over ~300k triangles) get a prompt offering to reduce them first — say yes.
- Reduce. On the Reduce tab, pick a target. 50k–150k triangles is plenty for a figure and keeps slicing fast.
- Size. On Size & base, set the figure height in mm and add a base if you want one.
- Pick your filaments. On Export, enter the spools you have loaded (name + color). See Guide 2 to dial the colors in.
- Generate colors. Press Generate colors. The preview shows exactly how the layers will print.
- Export 3MF. Click Export full color. Open the .3mf in Bambu Studio, check the filament order matches, and slice.
Tip: Quick mode (top right) hides the Edit tools and shows just Reduce → Size → Export. Perfect if your model is already clean.
▶Video coming soon — 3-minute walkthrough, model to slicer.
Guide 1 · continued
The tabs at a glance
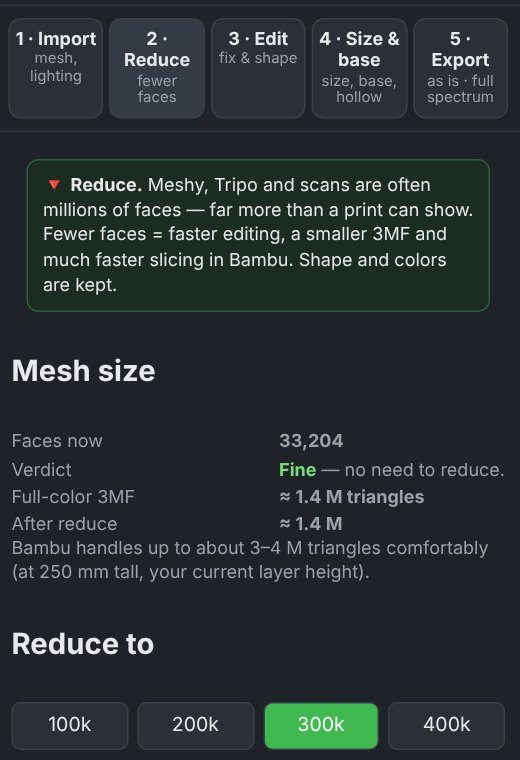
Reduce — shrink heavy meshes before you work on them.
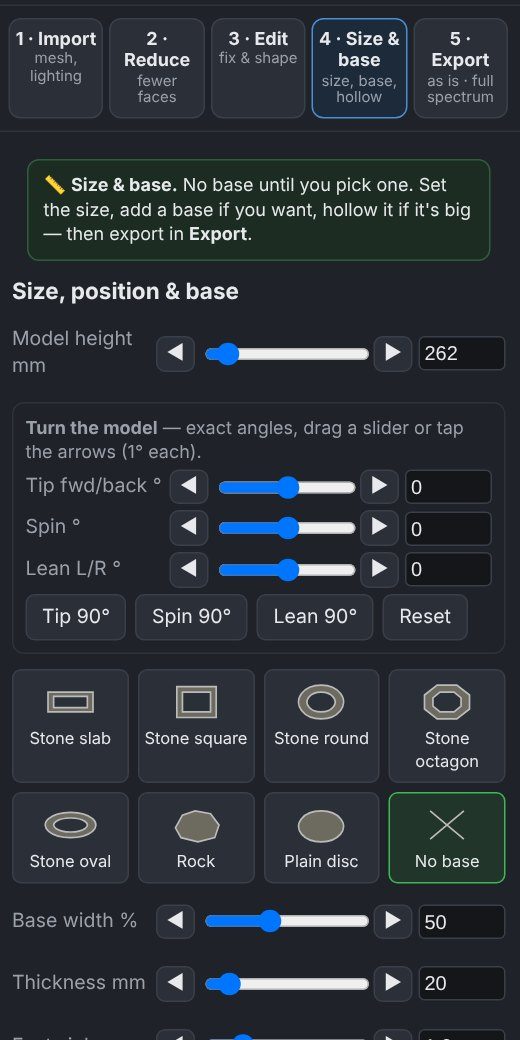
Size & base — height, base shape, and base thickness.
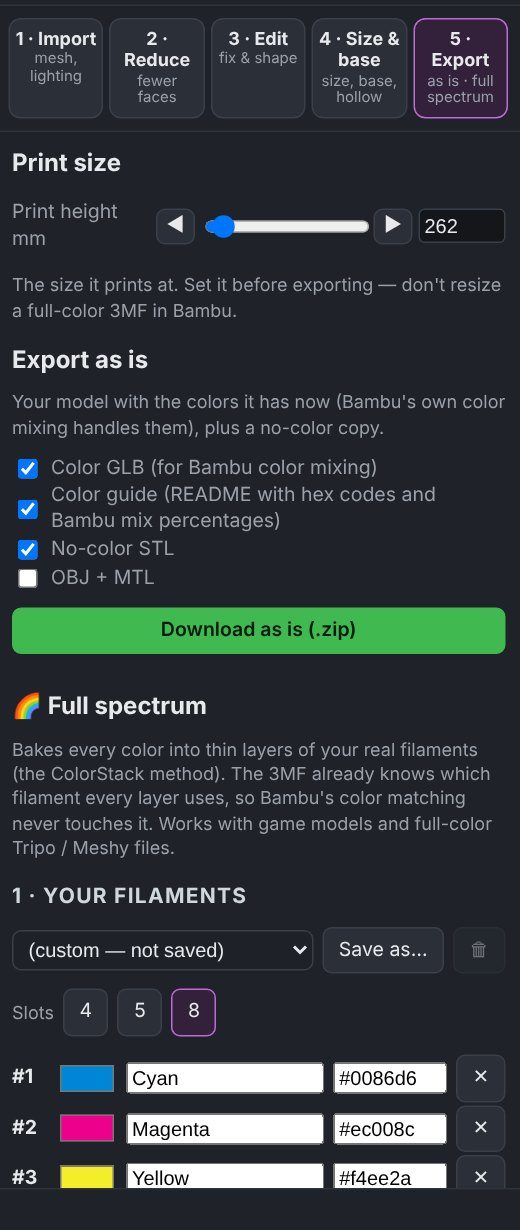
Export — filaments, layer settings, generate & export.
Export settings that matter
| Setting | What it does | Start with |
|---|
| Export method | Painted surface paints the colors onto the model (easiest to support). Layer modifiers uses height ranges — use it if your slicer smears sharp color edges. | Painted surface |
| Layer height | Must match your slicer. Thinner layers = smoother blends. | 0.08 mm |
| Top surfaces | Color used for flat tops. Defaults to the closest solid filament so tops don't stripe. | Closest solid |
| Smoothness | Trades color accuracy for fewer filament swaps. Higher = smoother, slightly less exact. | Default |
| Avoid lone lines | Stops a single odd layer (e.g. one black line in a grey area) that shows up as a band. | On |
| Solid if close | If one spool is already close to the target color, prints it solid instead of mixing. | On |
| Layer order | Even repeat spreads the colors in a fixed rhythm so there's no drifting banding. | Even repeat |
Before you export: Look at the preview close up. What you see is what will print — stripes in the preview will be stripes on the model.
Guide 2
Set up your filaments & the calibration swatch
Do this once per filament set10 min + one print
The app can only match colors as well as it knows your filament. A hex code off a website is a guess; the swatch tells you what your spools really look like when layered.
1. Enter your spools
On the Export tab, add each filament you'll load, in the same order as your AMS slots. A good full-spectrum starter set:
| Cyan | Magenta | Yellow | White |
| Black | Green | Red | Grey |
Cyan, Magenta, Yellow, White and Black can mix almost anything. Extra spools (green, red, grey) make common colors solid and cleaner.
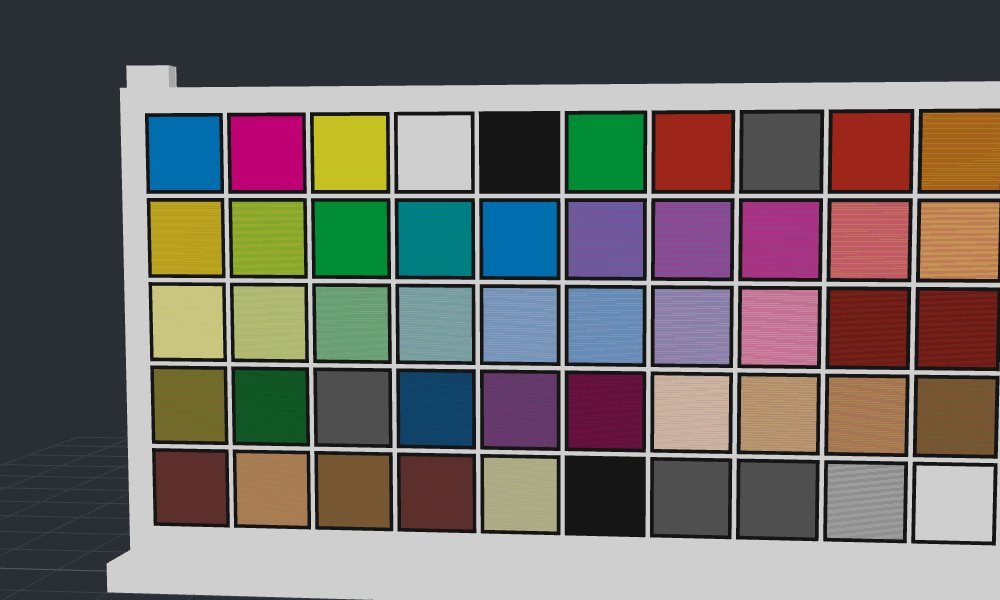
The calibration swatch: a flat card of numbered patches with a white frame.
2. Print the swatch
- On Export, click Calibration swatch. You get a .zip with the 3MF and a README listing what color every patch is supposed to be.
- Print it with the same layer height and filaments you'll use for figures.
- Compare the print to the screen under good light. Pure-spool patches show if a filament's hex is off.
3. Tune
- If a pure-spool patch looks different than on screen, adjust that filament's color in the app until the on-screen patch matches the print.
- Regenerate and reprint only if you changed a lot. Small tweaks are usually enough.
- Save the project (Guide 6) so your tuned filament set comes back next time.
Tip: Translucent filaments mix differently than opaque ones. Matte, opaque PLA gives the most predictable results.
▶Video coming soon — printing and reading the swatch.
Guide 3
Bambu Studio settings
Bambu Studio / OrcaSlicer5 minutes
The colors are already baked into the 3MF. The slicer's job is to print the layers exactly — not to blend or "improve" them.
| Setting | Value | Why |
|---|
| Layer height | 0.08 mm | Must match the layer height you used in the app. If they differ, the colors land on the wrong layers. |
| First layer height | 0.2 mm | Better bed adhesion. The base is usually a single color anyway. |
| Filament order | Same as app | Slot 1 in the app = Filament 1 in Bambu. Check the colors line up after opening. |
| Interlocking / segmented region | Off / 0 | These settings reshape color borders and fight the baked layers. |
| Prime tower | On | Keeps colors clean after every swap. |
| Flushing volumes | Auto | Lower only once you're happy with color quality. |
Painted surface vs. Layer modifiers
Painted surface (default). Colors are painted onto the triangles. Easy to add supports, easy to edit in Bambu.
Known issue: on very sharp edges between two solid colors, Bambu can flip the color to the neighbouring triangle.
Layer modifiers. Each color band is a height range. Very robust, but harder to edit in the slicer.
Use it when: the painted version smears corners and recoloring didn't fix it.
Smeared corners? First try swapping the two neighbouring colors (or nudging one) so they aren't both solid at the sharp edge. If that doesn't work, export with Layer modifiers.
Moiré in the preview? Wavy patterns in Bambu's layer preview are usually a screen effect from thin stripes. Zoom in — if the layers look right up close, the print will be fine.
▶Video coming soon — from 3MF to sliced plate in Bambu Studio.
Guide 4
Fixing a broken model
Intermediate10 minutes
AI and game models often have holes, floating bits and paper-thin parts. The Edit tab fixes them without leaving the browser.
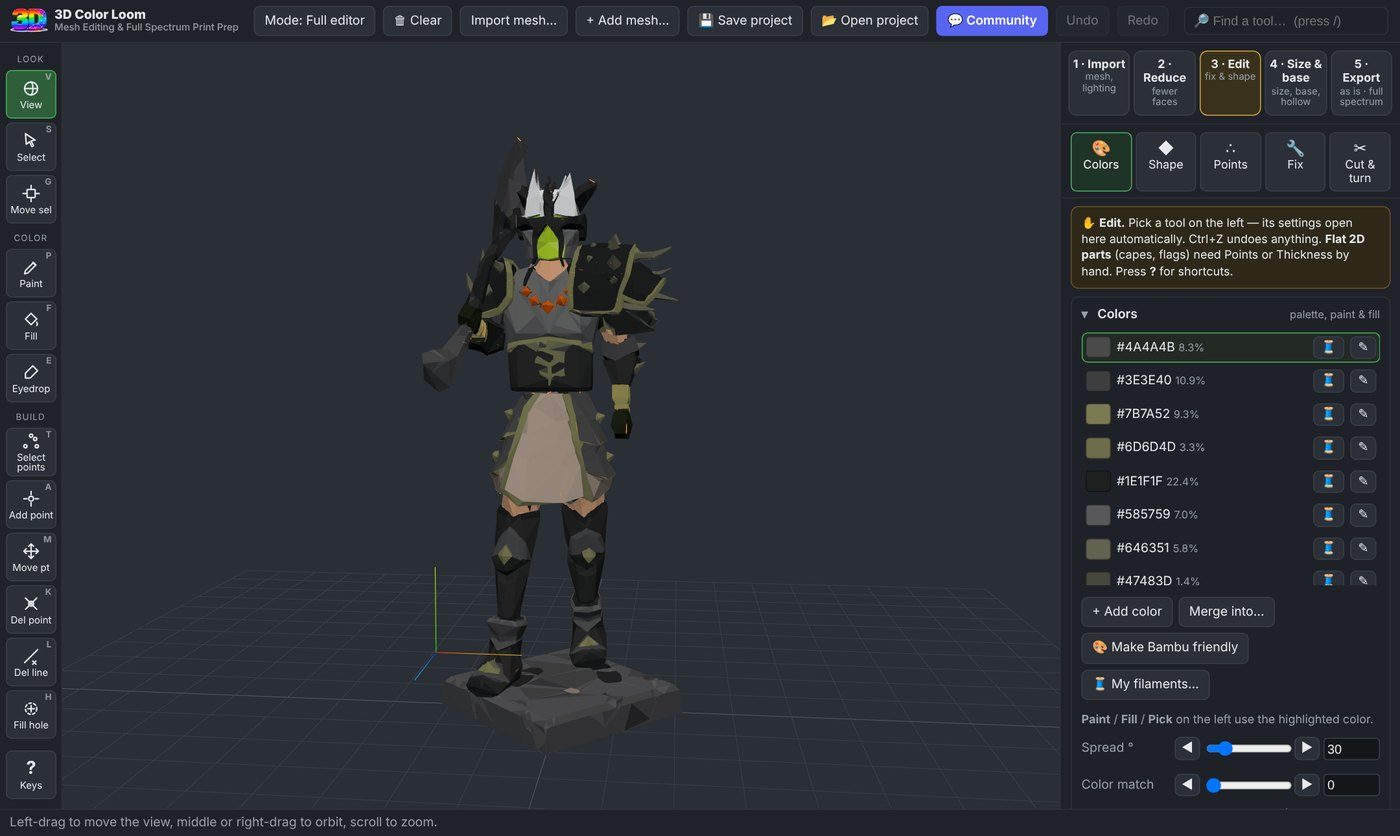
The Edit tab: tools on the right, model in the middle. Problem edges are highlighted.
Clean-up tools
| Fill hole | Closes an open gap so the model is watertight. |
| Del line L | Click a stray line or sliver to delete it — for junk edges with no full triangle to select. |
| Remove stray lines | Auto-cleans thin flaps near problem edges. |
| Delete loose points | Removes floating dots and tiny islands. |
| Thicken | Beefs up thin parts (capes, blades, ears) so they print. |
Shape tools
| Cut away | Slice off anything below or beside a plane — great for a flat bottom. |
| Fill to floor | Extends feet straight down so the figure stands on the base. |
| Undo Ctrl+Z | Step back any edit. |
| Find a tool / | Search every tool by name. |
| Save Ctrl+S | Saves a project file you can reopen. |
Recommended order
- Reduce first so every tool is fast.
- Delete loose points, then Remove stray lines.
- Use Del line on anything left over, then Fill hole.
- Cut away or Fill to floor to give it a flat, stable bottom.
- Thicken anything under ~1 mm at your final size.
▶Video coming soon — repairing a Meshy model step by step.
Guide 4 · continued
Building triangles by hand
Intermediate10 minutesEdit → Points
When the auto tools can't close a gap — or close it wrong — you can build the missing surface yourself, one triangle at a time.
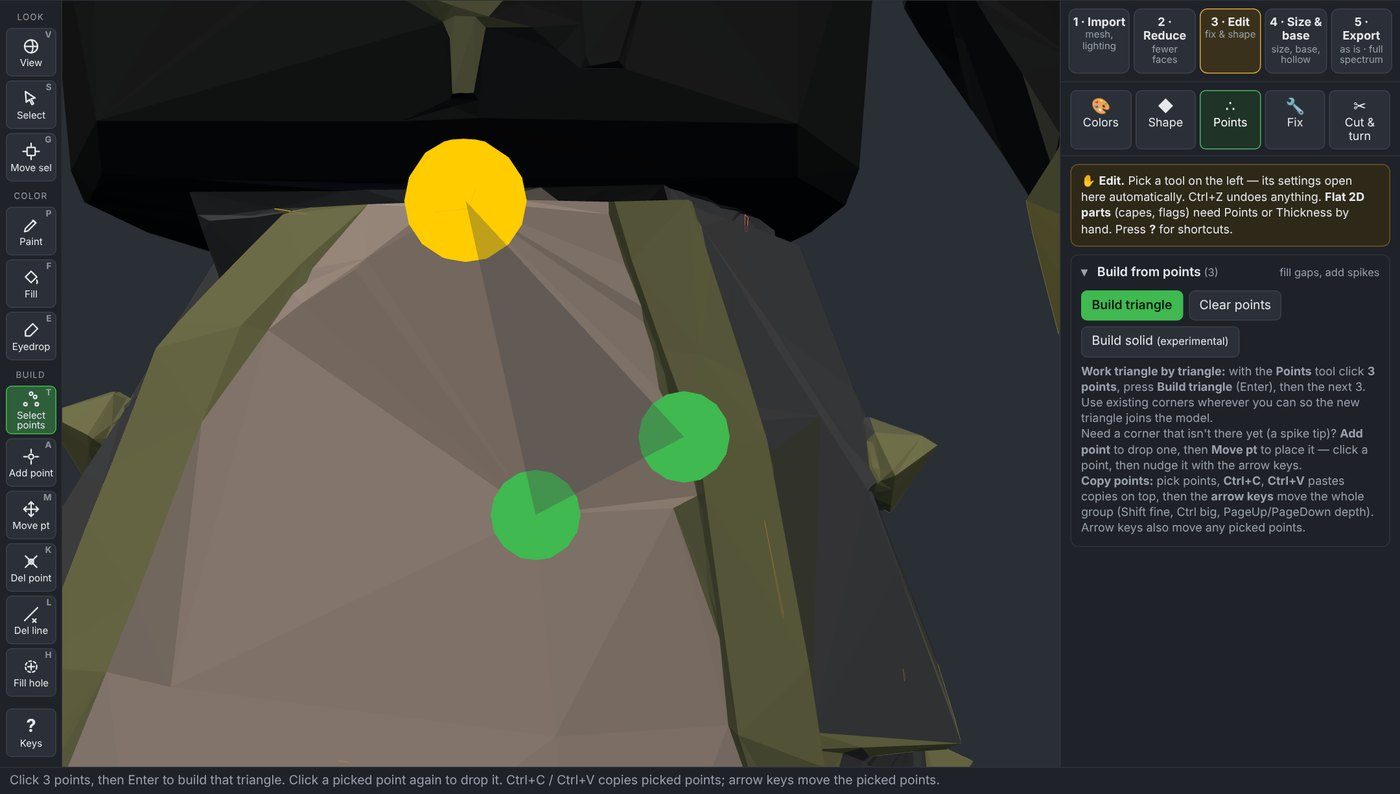
Three points picked (highlighted). Press Build triangle or Enter to make the face.
Build a triangle
- Go to Edit, pick Select points T.
- Click 3 existing points around the gap. Click a picked point again to drop it.
- Press Enter (Build triangle). Repeat for the next 3 until the gap is closed.
- Paint the new triangles to match (Paint P or Eyedrop E first).
Use existing corners wherever you can. A triangle that shares corners with the model joins it; one floating in space leaves a new hole.
Point tools
| Select points T | Pick corners for the next triangle. |
| Add point A | Drop a new corner on the model (e.g. a spike tip). |
| Move pt M | Drag a point, or nudge it with arrow keys. |
| Del point K | Delete a point; the gap is patched flat. |
| Ctrl+C / V | Copy picked points, paste copies on top. |
| Arrow keys | Move picked points. Shift fine, Ctrl big, PgUp/PgDn depth. |
Common jobs
| Close an odd gap | Fan triangles across it from one corner to the next, working around the edge. |
| Add a spike or horn tip | Add point at the base, Move pt it out to the tip, then build a triangle from the tip to each pair of base corners. |
| Triangle looks dark / inside-out | Select it and press Flip. |
▶Video coming soon — closing a gap and adding a spike by hand.
Guide 5
Troubleshooting
The most common problems and the setting that fixes each.
| Problem | Likely cause | Fix |
|---|
| Visible bands / stripes | A lone dark layer inside a light color, or an uneven color rhythm. | Turn on Avoid lone lines and set Layer order: Even repeat. Raise Smoothness a little. |
| Grey area with white lines | Mixing a color one spool already prints well. | Turn on Solid if close, or add a grey spool. |
| Striped flat tops | Tops showing the layer mix. | Set Top surfaces to the closest solid filament (default). |
| Colors don't match screen | Filament hex codes are guesses. | Print the calibration swatch and tune your filament colors (Guide 2). |
| Slicer is slow / crashes | Too many triangles. | Reduce to 50k–150k before generating colors. |
| Smeared colors on sharp edges | Slicer flips paint to neighbouring triangles. | Rearrange or nudge the two colors, or export with Layer modifiers (Guide 3). |
| Deleted parts came back | Older version — fixed in v1.0. | Update / refresh the page. Size & base now keeps your edits. |
| Thin bits missing in print | Walls thinner than the nozzle. | Thicken in Edit, or print the figure larger. |
| Wavy pattern in preview | Screen moiré, not the print. | Zoom in to check. Usually nothing to fix. |
Still stuck? Post a screenshot of the app preview and the slicer preview in the Discord — those two images answer most questions.
Guide 6
Saving your work & getting help

The header: 💾 Save, 📂 Open and Community.
Save a project
Click 💾 Save in the header (or Ctrl+S). You get a .3dcl file with your edited model, colors, filaments and every setting.
To pick up later, click 📂 Open or drag the .3dcl file onto the page.
Nothing is stored online. Your model never leaves your computer — so save a project file before closing the tab or if you'll be away for a while.
Exports vs. projects
| .3dcl | Your work-in-progress. Reopen in 3D Color Loom. |
| .3mf | The finished print file for your slicer. |
Community
Questions, print photos, feature ideas and bug reports all go in the Discord. Click Community in the app, or join:
discord.gg/kEuFU3kdjK
Share your prints
Post your finished figure with the filament set you used. It helps others pick spools and helps us tune the defaults.
3dcolorloom.com · Free, runs in your browser · v1.0